Do you ever look at a canvas and think about adding a touch of dynamic movement, maybe a splash of something that feels alive? Well, learning how to draw dripping paint can certainly bring that kind of energy to your artwork. It is a technique that gives art a raw, immediate feeling, almost like the paint just moved there a moment ago. This effect, you know, it captures attention and adds a really cool, expressive layer to any piece. It can transform a flat image into something with depth and a story, too it's almost.
Creating paint drips, whether you are using traditional brushes or working on a screen, is a skill that many artists find very rewarding. It is not just about making lines go down; it is about understanding how liquids behave, how light hits them, and how they interact with surfaces. This guide will walk you through the steps, focusing on digital methods, so you can make your art feel more spontaneous and, quite frankly, more exciting. You will learn to add that liquid flow that makes people stop and look.
So, get ready to explore the magic of gravity and color as we break down the process of drawing those compelling drips. We will cover the basic principles, the tools you might use, and some specific digital tricks to make your paint look like it is truly running down the canvas. By the end, you will have a better grasp on how to draw dripping paint, adding a cool new trick to your creative toolkit.
Table of Contents
- Why Dripping Paint Matters
- Tools You'll Want for Digital Drips
- The Basics of How Paint Moves
- Step-by-Step: Making Your First Digital Drips
- Digital Tips for Getting It Right
- Things to Look Out For
- Keep Practicing, That Is the Way
- Frequently Asked Questions About Drawing Drips
- Your Next Step in Digital Art
Why Dripping Paint Matters
Dripping paint, you know, it is more than just a random mark on a surface. It conveys a feeling of motion and gravity, suggesting that the art piece is still forming or changing. This effect can show raw energy, a sense of urgency, or even a feeling of decay, depending on how you use it. It adds a sort of wildness to your work, which is pretty cool. For artists, adding drips can mean breaking away from perfect lines and embracing a more fluid, organic way of creating.
Consider how a drip can lead the viewer's eye down the canvas, or how it can create a sense of texture without actually being raised. It is a visual trick, in a way, that makes flat images feel more dynamic. People often connect drips with street art or abstract expressionism, but honestly, they can fit into so many different art styles. They give a piece a bit of an edge, a touch of something unexpected. It is a technique that can make your art stand out, apparently.
When you learn how to draw dripping paint, you are not just copying a look; you are learning about the properties of liquids and how to represent them visually. This understanding can help you with other effects, like water drops or melted wax. It is a foundational skill for anyone interested in making things look wet or fluid in their art. So, it is a pretty useful thing to know, that.
Tools You'll Want for Digital Drips
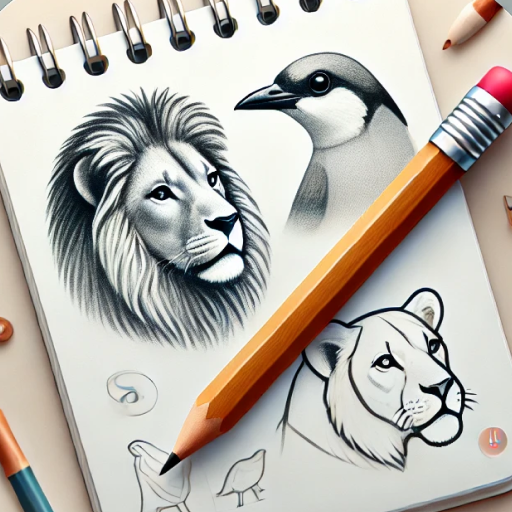
For digital art, you do not need much to start making those cool drips. A drawing application is the main thing, of course. Something like Sketchpad, for instance, offers a free online drawing application for all ages. It lets you create digital artwork to share online and export to popular image formats like jpeg, png, svg, and pdf. This kind of tool gives you a blank canvas to begin with, which is nice.
You will want a brush tool that lets you control the size and the edge softness. Some brushes have a bit of a texture, which can be useful for showing how paint might break up as it flows. A good eraser tool is also a must for cleaning up mistakes or shaping your drips more precisely. And, you know, a color picker is always handy for getting just the right shade for your paint.
Many digital drawing applications, like the one we mentioned, let you customize tools and even access tool presets. This means you can set up a brush that acts just like a dripping paint effect, saving you time later on. You can easily draw, edit photos, or design your next business card, too. It is all about finding the right digital makerspace that feels good to you. Some applications even allow you to draw on a blank canvas or provide starting templates for patrons to paint atop, which is quite useful.
The Basics of How Paint Moves
Before you draw a single line, think about how real paint drips. Gravity is the big player here, pulling the liquid down. But paint is not just water; it has thickness, or what we call viscosity. A thin paint will run quickly and make long, narrow drips. A thick paint, on the other hand, will move slower and might form chunkier, more uneven drops. This is a very important point to remember.
The surface also matters. If the surface is smooth, the paint might slide down in a continuous stream. If it is rough, the paint might catch on bumps, creating broken lines or forming little pools along the way. Think about how the paint gathers at the bottom of a drip, forming a little bead before it finally lets go or stops. That is a detail that makes a drip look real.
Also, paint does not just drop straight down in a perfect line. It often wiggles a bit, or it might split into smaller rivulets. Sometimes, a drip might even stop halfway down if the paint dries or if it hits something that absorbs it. Keeping these things in mind will help you make your digital drips look much more believable. It is all about observing the world around you, isn't it?
Step-by-Step: Making Your First Digital Drips
Start Where the Drip Begins
To begin your digital drip, you want to place your brush at the point where the paint would first start to run. This is usually at the bottom edge of a larger painted area, or maybe from a spot where a blob of paint has gathered. Think of it as the source. Use a brush that has a soft edge, or one that is a bit blurry, so the start of the drip blends into the main color. You do not want a sharp line there, generally.
Make this starting point a bit wider than the rest of the drip will be. This shows that the paint has accumulated there before it began its downward journey. You might even give it a slightly irregular shape, not a perfect circle, because paint rarely behaves in such a neat way. This initial shape sets the stage for the whole drip, so take a moment to get it right. It is, you know, the foundation.
Consider the color here, too. It should match the main paint color, of course. But if you are going for a very realistic look, you might make this starting point just a tiny bit darker or lighter, depending on how the light hits it. This subtle change can add a lot of depth right from the beginning. So, this first step is pretty important for the whole effect.
Give the Flow a Shape
Now, draw the actual path of the drip, moving downwards from your starting point. Do not make it a perfectly straight line. Paint, as we discussed, usually wiggles or narrows and widens a bit as it flows. Try to vary the width of the line as you draw it, making it thinner in some spots and a little thicker in others. This makes it look more organic, more like a real liquid moving, that.
You can use a slightly thinner brush for this part, or you can draw a wider path and then use an eraser to carve out the narrower sections. Think about how a stream of water might flow down a windowpane; it is rarely a uniform line. It is okay if it is not perfect; in fact, imperfections often make it look more real. This is where the burstiness comes in, really.
If you are drawing multiple drips, make sure they do not all look the same. Some might be short and stubby, others long and thin. Some might curve to the side, while others drop straight down. This variety adds a lot of visual interest to your piece. It keeps the viewer's eye moving and makes the artwork feel more alive, in a way.
Put in the Little Drops
At the very end of your drip, or sometimes along its path, paint tends to gather into a small, rounded shape before it either falls off or stops. This is the droplet. You want to add a little blob at the bottom of each drip, making it slightly rounder and perhaps a bit thicker than the line leading to it. This shows the weight of the paint, sort of, pulling downwards.
For a very realistic look, you might even add a tiny, almost invisible, line connecting this final droplet to the main drip line. This suggests that it is still attached, just barely. The size of this droplet can vary too; some might be big and heavy, while others are just small, lingering beads. It depends on the paint's thickness and how much paint is flowing, actually.
Sometimes, a drip might not even reach the bottom of your canvas. It could stop halfway, leaving a smaller, more subtle droplet. This adds another layer of realism, showing that the paint dried or ran out of momentum. Think about where your drips would naturally end, given the imaginary conditions. This attention to detail makes a big difference, you know.
Light and Dark for Realism
To make your drips really pop and look three-dimensional, you need to think about light and shadow. Imagine where your light source is coming from. On one side of the drip, where the light hits it directly, you will want to add a very thin, bright highlight. This makes the drip look wet and reflective. It is just a little line, but it does so much.
On the opposite side, away from the light, add a slightly darker shade of your paint color. This creates the shadow, giving the drip its roundness and depth. The shadow should follow the curve of the drip, making it look like it is standing out from the surface. Do not make these shadows too harsh; they should blend softly into the main color of the drip. It is about subtle changes, really.
For the very bottom of the droplet, where it is thickest, you might add a tiny, almost invisible, cast shadow on the surface underneath it. This makes it seem like the droplet is truly sitting on the canvas, rather than just being painted flat. These light and dark touches are what make a flat drawing look like something you could almost touch. They are very important for realism.
Adding Layers for More Depth
Using layers in your digital drawing application is a smart move when drawing drips. You can put each drip, or even parts of a drip, on its own layer. This gives you so much control. If you make a mistake on one drip, you can just erase it on that specific layer without messing up the rest of your artwork. It is a lifesaver, honestly.
You can also use layers to build up the drip effect. For instance, you might draw the main body of the drip on one layer, then add the highlights on a layer above it, and the shadows on another layer. This allows you to adjust the transparency or blend modes of each part independently. It gives you a lot of flexibility to experiment with different looks. This is a very powerful technique, you know.
Some artists even create a base layer of paint, and then add a separate layer for all the drips on top. This helps keep your main artwork clean while you focus on the dripping effect. It also means you can easily turn the drips on or off to see how they look with and without them. This kind of organization makes the whole process much smoother, you know, and helps you keep track of things.
Digital Tips for Getting It Right
Brush Settings Are a Big Deal
In digital art, your brush settings are incredibly important for getting the right drip look. Look for options like "flow" or "opacity" and "jitter." A brush with variable opacity can make the drip look thinner or more translucent in places, just like real paint might be. You might also want to play with brush "shape dynamics" or "angle jitter" to make the drips look less uniform and more natural. This gives them a bit of a random feel, which is good.
Experiment with brushes that have a slight texture to them. This can mimic the subtle imperfections of paint as it flows, or the way it might break up on a rough surface. Some applications even have brushes specifically designed for liquid effects or drips. Do not be afraid to try out different ones until you find something that feels right for the effect you are trying to create. It is all about finding what works for you, you know.
How Opacity and Blending Work
Opacity is your friend when drawing drips. Real paint can be opaque, meaning you cannot see through it, or translucent, where you can see the layer underneath a little. By adjusting the opacity of your digital brush, you can make your drips look thicker or thinner. This helps a lot with showing depth and how much paint is actually flowing. It is a subtle but important detail, you know.
Blending modes are also super useful. If you put a drip on a layer above your main painting, you can try different blending modes like "multiply" for shadows or "screen" for highlights. This can make the drip interact with the colors underneath in a very natural way, rather than just sitting on top. It helps the drip feel like it is part of the original artwork, not just an add-on. So, play around with those settings, too.
Using Layers to Keep Things Tidy
We touched on this before, but really, using layers for your drips is a game-changer. It means you can adjust each drip individually without affecting anything else. You can move a drip, change its color, or even delete it entirely without redoing a whole section of your art. This makes the process much less frustrating, honestly.
You might even create a "drip layer group" if your application allows it, keeping all your drip layers together. This helps keep your layer panel organized, especially if you have a lot of drips. It is like having a separate workspace just for your liquid effects. This kind of organization can really speed up your workflow and make experimentation much easier. It is a very good habit to get into, you know.
Things to Look Out For
When you are learning how to draw dripping paint, it is easy to make a few common missteps. One big one is making all your drips look exactly the same. Real drips are rarely uniform; they vary in length, width, and how they curve. Try to introduce some randomness. Another common thing is making the drips too opaque, especially if you want them to look thin or translucent. Remember to play with your brush opacity.
Sometimes, people forget to add those subtle light and dark areas. Without highlights and shadows, a drip can look flat and lifeless. It just sits there on the canvas, rather than looking like a wet, moving substance. Pay attention to how light would hit a real liquid. Also, do not forget the little blob at the end of the drip; that small detail really sells the effect, you know.
Finally, avoid making your drips look too "clean." Real paint drips often have little imperfections, like tiny breaks in the line or slight variations in color. Embracing these small flaws can actually make your digital drips look much more authentic and less like they were made by a machine. It is about letting go of perfection a little bit, which is often a good thing in art, you know.
Keep Practicing, That Is the Way
Like any art technique, getting good at drawing dripping paint takes practice. Do not get discouraged if your first few attempts do not look exactly how you imagined. Every time you draw a drip, you are learning more about how paint behaves, how your digital tools work, and how to control your hand. It is a skill that builds over time, you know.
Try drawing drips on different backgrounds, with different colors, and from different angles. See how they look on a dark surface versus a light one. Experiment with making them look thick or thin, fast-moving or slow-moving. The more you experiment, the more you will understand the nuances of this effect. You could even try drawing the letter “s” to take a shortcut to the style chooser in Sketchpad, which might help you quickly change brush styles for different drip effects. It is all about trying new things, you know.
You might even find it helpful to look at real-life examples of dripping paint, whether it is on a wall, a sign, or even a piece of abstract art. Observe how the light catches it, how the edges look, and how the paint gathers. This kind of observation will really improve your ability to replicate the effect digitally. It is about training your eye, really.
Frequently Asked Questions About Drawing Drips
How do you make paint look like it's dripping?
To make paint look like it is dripping, you typically draw a wider starting point at the top, then a narrow, wavy line going downwards. At the bottom, you add a rounded blob for the droplet. Crucially, you then add highlights on one side and shadows on the other to give it a three-dimensional, wet look. Varying the line's thickness and adding small imperfections helps a lot, too it's almost.
What makes paint drip?
Paint drips because of gravity pulling the liquid down, especially when the paint is applied thickly or has a lower viscosity (meaning it is thinner). The surface it is on also plays a role; a very smooth, non-absorbent surface allows paint to flow more freely, while a rough or absorbent one might slow it down or stop it. It is a combination of the paint's properties and the surface it is on, really.
Can you draw drips with a pen?
Yes, you can absolutely draw drips with a pen! While it will not have the same texture or translucency as painted drips, you can create the illusion of drips using line weight and cross-hatching for shading. You would follow the same principles of drawing the starting point, the flowing line, and the droplet, then use darker lines or more dense hatching to create shadows. It is all about creating the visual effect, you know.
Your Next Step in Digital Art
So, you have got a good handle on how to draw dripping paint, and hopefully, you are feeling ready to try it out. Remember, the key is observation, practice, and a willingness to experiment with your tools. Whether you are aiming for subtle little trickles or bold, dramatic streaks, this technique can add so much character to your digital artwork. It is a way to make your pieces feel more alive, more spontaneous, and truly unique.
Why not put these tips into action right now? You can easily draw, edit photos, or design your next business card using a free online drawing application for all ages, like Sketchpad. It is a great place to start experimenting with these new skills. You can even watch videos for tips and tricks on how to use Sketchpad and get the most out of the app! Learn more about digital art tools on our site, and discover more features on our tools page. For more inspiration on liquid effects in art, you might check out examples of abstract expressionism, where drips are often a central element.

Detail Author:
- Name : Mrs. Magnolia Hyatt
- Username : belle.littel
- Email : wmurazik@davis.info
- Birthdate : 1970-04-20
- Address : 876 Maximo Field East Rosaleemouth, NE 32458-9268
- Phone : +1-978-422-9196
- Company : Bergnaum, Connelly and Wolf
- Job : Electric Meter Installer
- Bio : Rerum temporibus similique esse et eligendi explicabo quis. Laudantium deleniti quod libero eos inventore quas. Est perferendis et cum aut. Ut voluptates qui voluptate velit quia.
Socials
twitter:
- url : https://twitter.com/emmettrussel
- username : emmettrussel
- bio : Tempore dolores quibusdam quos et fugit modi porro. Accusamus velit nemo facilis animi enim quod. Voluptatem aliquam et iusto ullam facilis.
- followers : 1676
- following : 1651
linkedin:
- url : https://linkedin.com/in/emmett_dev
- username : emmett_dev
- bio : Explicabo in dolorem ea dolores corrupti qui.
- followers : 5963
- following : 1308
tiktok:
- url : https://tiktok.com/@emmettrussel
- username : emmettrussel
- bio : Quam culpa eligendi velit rerum sequi. Et asperiores eius sit aut aut fuga.
- followers : 652
- following : 2621
instagram:
- url : https://instagram.com/erussel
- username : erussel
- bio : Vel omnis rerum quas voluptate dolores sit. Officiis sit sit sit nisi omnis dignissimos.
- followers : 5411
- following : 857
facebook:
- url : https://facebook.com/russel1972
- username : russel1972
- bio : Molestias eligendi incidunt et modi incidunt laboriosam qui.
- followers : 1460
- following : 754
